

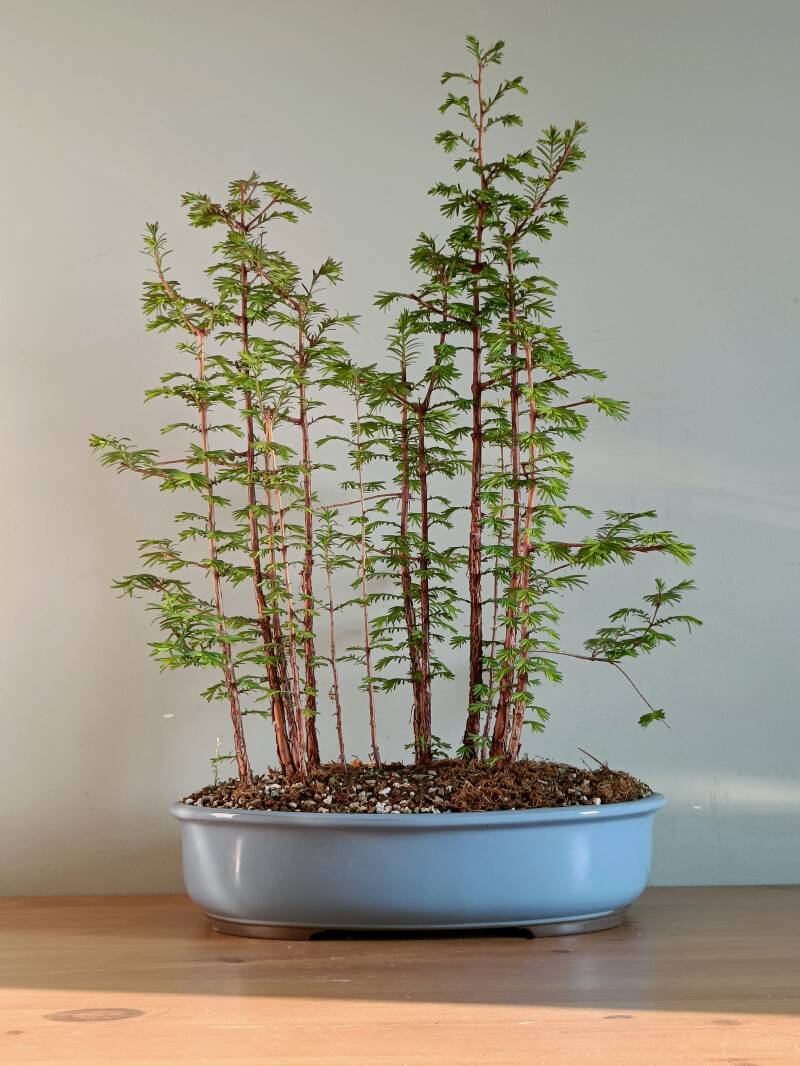
a young forest planting
I grew these dawn redwoods (Metasequoia glyptostroboides) from seed about 3 years ago. In the winter of 2019 I cold stratified them in the fridge for a month and then randomly sowed them in a shallow container. This method of creating forest planting can give surprising results, as you don't know what the composition will look like in the end.
All the trees that germinated and survived the first year were then left to grow until last fall. This made sure that the trunks thickened a bit. Right now, the largest one is about as thick as a pencil. Dawn redwoods are strong growers. If I had planted them in the ground, they'd be a lot taller and have thicker trunks!
Last year I did an emergency repotting during summer, because the planting was becoming so pot bound that water couldn't penetrate the soil. Other than this, I just left them to grow freely.


In the fall of 2021 I pruned them for the first time. This was a very rough pruning, in order to slow down the growth of some trees. The goal was to make sure that the trunks of the trees will eventually have different diameters and the trees vary in height, as you see in natural forests.
Trees on the edge of the composition were pruned shorter. Short trees in the back and the front of the composition create the illusion of depth. Short and thin trees in the back will give the appearance of being further away from the viewer.
The ones more in the center were left taller, to create focal points that draw the viewers attention. This (random!) composition features two 'groups of trees', on the right and left. In between the two groups there are two very thin trees in the back, to stop your eye from looking 'through the forest'.


Group of trees on the left
Group on the right hand side
Pruning and branch selection
When I pruned the trees for the first time, I selected branches that I wanted to keep for the future design. Luckily, almost all of them survived the following winter.
Branches of dawn redwood grow opposite from each other (see picture on the right).
If the branches are left to grow that way, the area of the trunk from which the branches emerge, can thicken up too much and create a bulge. This is not good! You want a tapering trunk: thick at the base and slender up top. Pruning opposing branches down to only one branch will ensure the trunk doesn't bulge.

Opposing branches. If left unpruned, this will create a bulge.

Prune one of the two opposing branche with sharp scissors

In the picture on the left you can see another growth habit of dawn redwood that can cause potential bulging and 'inverse taper'. The woody branch, encircled in red, is last years growth, that I left there to create a primary branch. Just underneath that branch, a new bud has opened and has started growing.
If you leave the new growth, it will eventually become a new branch on its own and the trunk will thicken fast. The new growth has to be removed to prevent this!
early SPring maintenance
Dawn redwood backbud quite easily. This means that every spring, new buds will open all over the tree, even in places you don't want any new branches. It's important that you remove these buds early on, so the tree doesn't 'waste' energy on new growth that you will remove anyway.
By doing this, you will force the tree to 'focus' its energy in other places, where you do want strong growth. For trees in this stage of development, you want growth
- in the apex, to thicken the trunks even more
- in the primary branches
The apex and primary branches will be cut back in early summer, after the growth has 'hardened' or lignified slightly. This will redirect energy (again), back to the lower parts of the tree, and on the primary branches closer to the trunk.
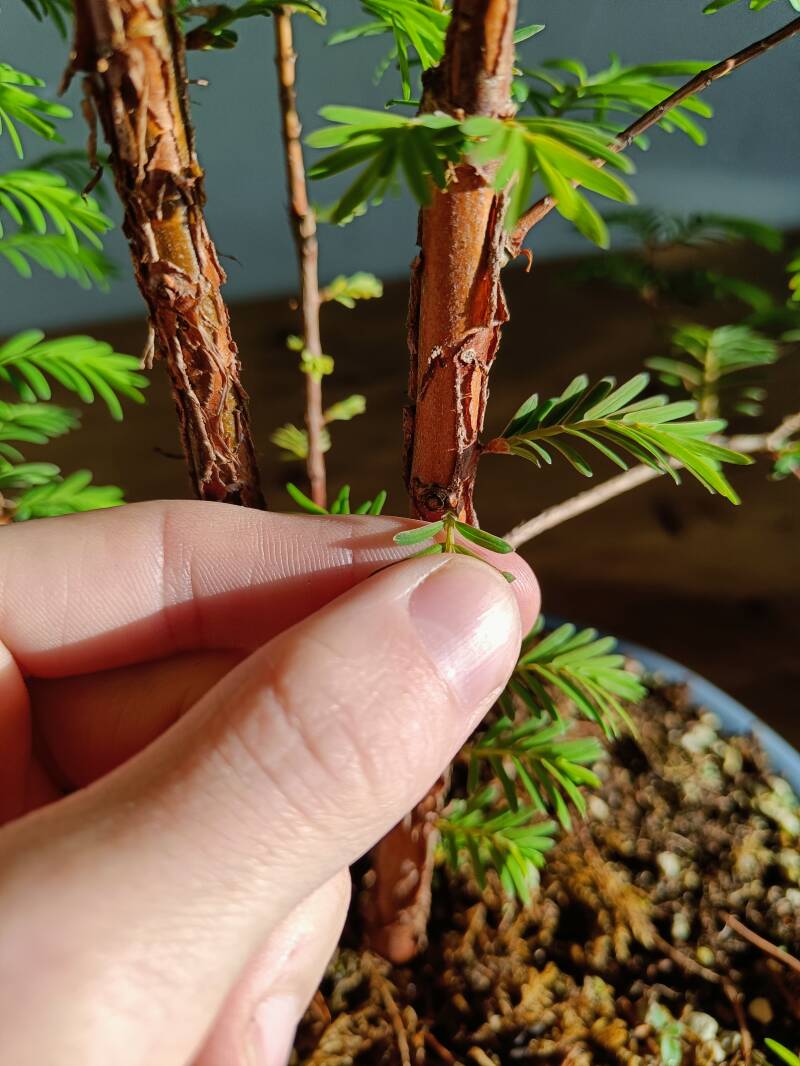
For now, I will just take of any new shoots that grow on the trunks, in places where I won't need any branches. You can just remove these small shoots with your fingers.


Larger shoots, for example last year's growth, should be removed with sharp scissors or even concave cutters. With concave cutters you can take away a little bit of wood, creating a 'deeper' wound or indentation. When callous (scar tissue) grows, it'll grow into the wound, rather than over the wound. This makes sure that the callous grows flat, following the line of the trunk, without creating a bump or bulge. This is important, especially for larger wounds. Afterwards you can seal the wound with cut paste or putty.


Small concave cutter
Branch removed with concave cutter
Covering the wound with putty

Above you can compare the forest before and after this light spring pruning. The main goal was to
- remove one of two opposing branches to prevent bulging.
- remove new shoots underneath existing branches
- remove unwanted new growth on the trunk to redirect energy
- prune some of last year's growth if needed.
That's all for now! In early summer I will prune it back harder to start creating more taper in the trunks and start ramifying the primary branches. Thank you for reading and make sure to subscribe for updates!
Add comment
Comments
I have a 3-tree forest that I purchased and a 11-tree forest I am currently growing in the ground. Great information here on care and pruning. . .